All I wanted was a Babyhawk mei tai... well not for 150 smackaroos... THEN all i wanted was a babyhawk pattern... well that wasnt available.... SO THEN what i wanted was $150..... but i just cant spare it for
another baby carrier.... but I NEED to go letterboxing and i cant do that without a baby hawk!!
Of course there are other mei tai's out there, some with patterns some cheaper... but those all have one big problem, that i cant get past... they arent Baby hawks!!!
The solution to my dilemma was to make one, and write a tutorial for all those other penny pinching babywearing momma's on the edge out there!!!
Here it is, a reversible baby carrier with all the style of a baby hawk.... lots and lots of pictures, but that is only because i broke it down so much... it is all so simple its scary(the last step is a little on the tricky side) so relax i did all the figuring out for ya, alls you gotta do it make it.
Lets get started!! Step One: find some coupons, head out to your local craft store, and buy 2 1/2 yards of cotton twill and a half yard of a patterned material (i used duck for its stability and durability, no need for an extra liner)
Prepare/Cut Fabric:
 |
| Prewash and dry your fabric... i hate doing this, but for this project it is a must! |
 |
| now iron it all... also something i HATE to do, but you must do it |
 |
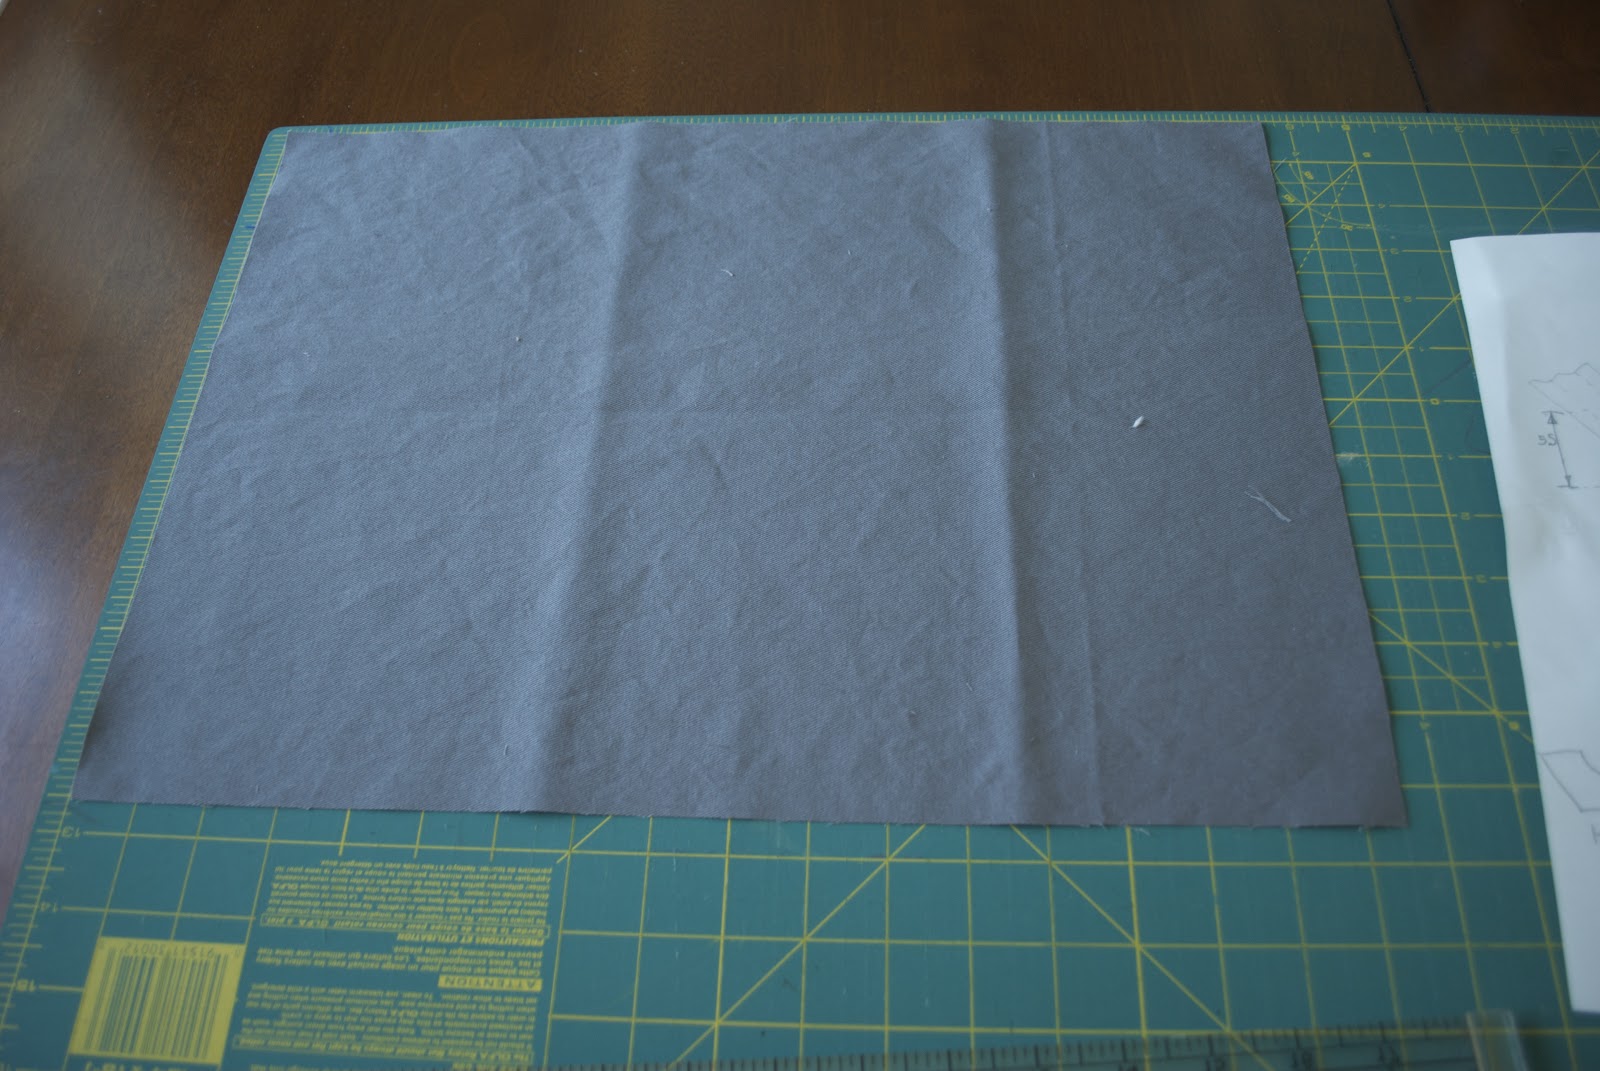
Cut out your pieces like this:
Primary color:
(cut down the length of the 2 1/2 yards)
3- 70" X 8.5" (straps)
2- 6" X 18" (body piece A)
1- 12.5" X 18" (body Piece B)
(You can also make body piece B a patterned piece but for husbands sake i used grey)
1- 12.5 X 17.5" (head rest)
Patterned Color:
1- 12.5" X 18" (body piece C) |
 |
| take your head rest square and lay it out flat |
 |
| fold it in half length wise |
 |
| then fold it in half long wise, then cut an angle on the top left corner that is 2 inches in and three inches down from the top |
 |
| it should look like this unfolded |
 |
| cut some batting 1/2 inch smaller all the way around |
Sew the body of the Mei Tai:
 |
| Sew(right sides together) body piece A to B, and body piece A to C ( i surged the seams after i sewed them, but still left the half inch seam allowance for added security) |
 |
sew both piece together with right sides facing each other,
until you make a tube, the should be in the order of A,B,A,C
|
 |
| iron the tube so that the two A pieces are folded in half, and the seams are matched |
 |
iron the seams so that when put together they are facing opposite
directions... for easier sewing and a less bulky look |
Sew the top two straps:
 |
fold and sew two "strap" pieces in half right sides together, sew an angle on
one end, and leave the other end open. Snip the corner so it lays flat when turned |
 |
| turn right side out... with a broom handle, it helps!!! |
 |
| iron... I know i HATE ironing too, but you HAVE to do it... so buck up and do it |
 |
i used foam for this part, cause i wanted it extra cushy, but you can use a
folded piece of batting. Cut it to 3 inches wide and 18 inches long |
 |
stuff into your straps, i hat to turn mine inside out up to where i wanted
the foam and pull it over the foam like putting on a pair of stockings |
 |
| make sure there is about 3 inches of fabric on the end before the foam starts, and then sew all the way down the foam plus and inch on each side... I sewed 1 inch in from each side of the strap. |
Sew the waist strap:
 |
| Fold you third strap in half, and the body of your mie tai in half, and line up the folded edges, mark/pin where the end of your mie tai is... you will be sewing up to these pins, so that the body of your mei tai can slide in. |
 |
| make sure to mark both layers |
 |
| sew up to your pins |
Attaching waist Straps:
 |
| flip right side out and then iron 1/2 inch fold in the un sewn section |
 |
| slid the body piece in 1 1/2 inches |
 |
Pin... I know I KNOW, you hate pinning... me too... just tell
yourself it will be worth it in the end! |
 |
| use the triple stitch setting for this top stitching |
 |
| sew it twice, very close to the top/opened edge of the waist strap |
Attach the top straps:
 |
| lay you body piece with waist strap attached onto your cutting board and measure how tall it is, cut it to 2 inches below your desired height (my desired height was 21 inches i cut it to 19 inches) then cut angles on each side 2 inches in from the side and 3 inches down from the top... refer to picture |
 |
| pin straps on, with foam even with angled sides |
 |
| i messed up here... but i will try and tell you what you should do, put your ruler a half inch down from the bottom point of your angled cut and trim the strap off at that line... then sew a box, with an X in it to reinforce the straps |
 |
| box with X... yours will look different, cause you will have done it right!! |
Adding the back rest: ALMOST DONE!!!
 |
| line you back rest with batting (it doesn't matter what kind, i would recommend against high loft, it is all i had on hand and it was quite difficult to work with) quilter spray adhesive will make your life much much easier!! fold your edges about a half inch over the batting on all sides |
 |
| lay your mie tai on top of the back rest and fold it in half over your mie tai,matching the angle of your back rest with the angle of your straps, and pin the dickens out of it!!! |
 |
| pin carefully matching the folded edges nicely... you can fold the angled cut of the body piece in towards the center of the mie tai, so that it wont stick out o the back rest |
 |
| sew carefully around the angle sides and bottom of the back rest. starting from one side and ending at the other... do not sew the folded top edge(unless you really want to i suppose) |
 |
| mark three lines across the back rest |
 |
sew them from one end to the other, go from the same end and the same direction
each time, so as to avoid bunching! |
Grab a happy baby and test it out:
 |
| baby three wasn't to happy, and didn't want to be attached to mommy in this way... he had other things in mind |
 |
| wow i really need to clean this mirror!! Baby 3 was fast asleep for this picture!! |


Wow, this is super awesome and exactly what I was looking for!! Other free tutorials online don't have that baby hawk look I wanted, and last time I checked in early sept. there was no cheater version anywhere online. So I started to think I would have to reinvent the wheel, but NO, you have done it for me! I have my fabric out, washed, pressed, and ready, a napping toddler, and I am so excited!! Baby # 3 is due in January and I know she will love it :) thank you for the tute!
ReplyDeleteI am glad you are trying it out!! I know how you feel about that "baby hawk look" it just seems so hip (and as a mother of three it is nice to feel hip sometimes) Let me know how it turns out, or if you have any concerns. Congrats on Baby #3!! Happy sewing!!
ReplyDeleteI'm excited to make this tonight! Headed out for fabric today. I've searched several tutorials and I think yours by far looks the best. I'm still not entirely sure about the correction on sewing the box around the straps...
ReplyDeletewow i am so late on this reply... i have been slacking on blogging as i get sicker from this pregnancy... if you are still stuck i hope this finds you well:
DeleteThe way i sewed the straps on was to reenforce them to hold heavy babies, just one stitch across the top when sewing the head rest on wouldn't make me feel safe when tieing baby on so that is the only reason for the box sewn on the straps, what i did was fine i just cut the straps to short... cause i "eye balled" it haha, should have thought it through before steaming ahead.
the line a half inch down from the angle cuts is a little above where your headreast will be sewn on so i was trying to maximize the area that you can reinforce the straps by sewing it to the body of the mie tie... My thinking is the bigger the box the better reinforced it is.
Though i have been using my mie tie for over a year now, with a rather heafty boy and boy has it seen abuse sitting on the floor of my car and shoved into bags and strollers and taied in a small ball to throw in my closet... Havent had a problem with any of the seams coming loose, so if you dont want the extra reinforcements than i wouldnt fret about it, it has been working out for me just fine!!
I've cut out all of my fabric but as i worked on the headrest, I cut the shape out right but the indent does not appear as deep as yours among a couple other noticeably different things. Did I measure wrong or was there a typo? Also how think was your foam?
ReplyDeleteMy foam was a half inch think i believe... i was quite worried about it being too thick when i was sewing it, but i am thankful for it now, it is holding up well and makes for a confortable back carry, as i dont like to cross the ties infront of me rather use it more like a back pack!
DeleteSo the more i look at the pictures the more i think it does look deeper than the demintions i specified!?!?! but the body is cute to that angle so logicaly the headreast should be cut at the same angle... so i am not sure what i did... may be it is the camera angle, or maybe i serged off a little bit of fabric when finishing the edges... i am stumped... i looked for the sketch book that i mapped all of this out on, and i cant seem to locate it... ugh I would assume that just completing the headreast as noted you should be successful, i should have had a good reason for typing it like that, i just cant seem to remember that far back!!!
Please let me know how it turns out!!!
Thanks so much for the pattern! I just finished the straps, and am about to add the foam. I was worried about making this at first because yours looks great and it seemed overwhelming....but now that I'm slowly taking it step by step it's coming out fantastic! Thanks for all your hard work so diy mom's like me can get a babyhawk at the fraction of the cost.
ReplyDeleteI am glad it is working out, it does seem like a lot of steps at first, mostly because i posted so many pictures! Please post a brag link to your finished "babyhawk" i am excited to see how it turns out!!
Deletei loved your tutorial. Mine turned out great, thank you!!!!
ReplyDeleteMine turned out great, thank you for this tutorial! I used minky for body piece B to make it reversible, and an extra layer of bottomweight in between.
ReplyDeleteAwesome!! Minky is a great idea, so stinking soft, i am sure your little passenger will appreciate it!! Please feel free to post a link or a picture!! I would love to see it!
ReplyDeleteLove this! I used it as a base and made some changes to work for me! You are awesome! I linked you up here: http://daisyandjune.com/diy-mei-tai-with-rings-tutorial/
ReplyDeleteI am glad you found it useful!! Your ring waist is a great idea, i can see the benefit of having it versus tying the waist straps! This carrier is also reversible, i did a patterned side for mom, and a solid grey side for dad.
ReplyDeleteThanks so much for your tutorial! I'll be trying it out very soon, but I'm going to do a little adjusting and make mine an onbuhimo. How old is your little one in the pics?
ReplyDeleteI am glad you are trying it, and making it suit your own needs!!! Please feel free to post a pic or link to you finished carrier!! in this picture, i believe he was 6 months... he hated the carrier(any kind of carrier) for the longes time, but now gets upset when i put the new baby in it, like he is missing out!! Crazy kids!
DeleteIt looks like you used a serger... how would you recommend sewing the edges without one? Or do you have a stitch like that on your machine that you just did on the edge of the fabric?
ReplyDeleteI am sorry it took so long for me to reply... i did use a serger, but if you dont have one, i would recommend using an overlock stitch or at the least a zigzag... if you dont have a stitch that is appropriate, you can use Fray Check on the edges, something to keep the material from fraying in the wash is important, so that seams don't come undone and your little one be put in danger!!
DeleteThank you for posting this tutorial. I have been looking and looking to make my own like this. However, how did you come up with your desired length? I'm only 5' and I'm not sure what my length should be. Thanks, can't wait to make this!
ReplyDeleteI am using a pattern that is directional, and I can't tell from the photos, but should the patterned panel be 12.5 wide and 18 tall or 18 wide and 12.5 tall?
ReplyDeleteThank you so much for this!! I am so excited to find some fabric and start. Just came across Baby Hawk yesterday and agree with you on "the look"! Toddler Tula was what I was looking at, but can't get past the astronomical price of some of them!!
ReplyDeleteThanks so much for this!! Just discovered Baby Hawk Mei Tai's last night and definitely agree with you on the "look".
ReplyDeleteSo excited to go find some fabric and start!!
Hi Anitra, I have a question for you. The directions says to cut out a 12.5 x 17.5 head rest piece. But in the next step, it says to lay your head rest "square" out flat. Per the cutting directions, this piece of material wouldn't be a square, yet the picture of if lying flat makes it look much bigger…like a 17.5 x 17.5 square or something. So I'm wondering what is the correct size material to cut for this piece?
ReplyDeleteThanks!
Pam